

Bring Professional Recording Quality Into your Home Studio and Start Making Music
We live in the most incredible time when it comes to music making. Gear is more affordable than ever, and more importantly, it sounds amazing. The “Million Dollar” studio is no longer needed to make hit records. If you’re starting out and are looking to put together your first recording studio setup, it is very easy to be lost and overwhelmed. Assuming you already have a decent modern computer, all you really need to make music and achieve a professional sound is broken down into four major components:
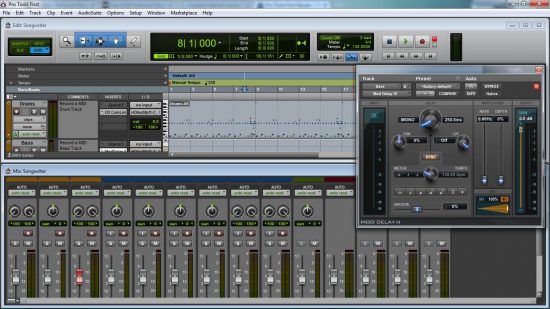
1. Digital Audio Workstation (D.A.W.)
A Digital Audio Workstation, most commonly known as DAW, is a computer software that allows the user to capture audio recordings, edit audio files, and process audio by emulating a studio console. Most DAW manufacturers provide a “lite”, or striped down version of their software for free that you can still use to record, edit, and process your audio. There are no good or bad DAWs, it really comes down to being familiar with software. Here are some examples of popular DAWs: Avid Pro Tools First (mac/pc), Ableton Live lite (mac/pc), Garageband (mac), FL Studio (pc), Steinberg Cubase LE (mac/pc), etc.
2. Audio Interface
An audio interface is a piece of hardware that can capture and playback audio. It converts the analog signal from its inputs to a digital signal, and converts back a digital signal from the computer to analog though its outputs. In other words, an audio interface allows you to connect professional microphones, instruments and other kinds of signals to a computer, and output a variety of signals to headphones, monitors, or other gear for further audio processing.
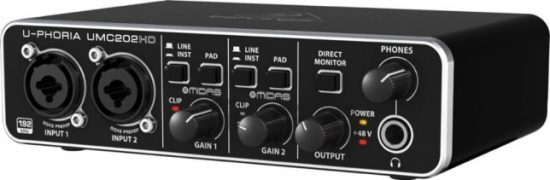
The Behringer UMC-202-hd is the perfect example that suits the home recording studio. It has two inputs and two outputs. It records at 24-Bit, up to 192 kHz resolution for professional audio quality. It connects to the computer via USB, and provides 48V phantom power for condenser microphones. Like many other audio interfaces, the UMC-202-hd comes with a free DAW. You can get it for around $70 on amazon right now.
3. Large Condenser Microphone
I n order to record audio, you need a microphone. Although the type of microphone needed depends on the application, large condenser microphones are suitable for most recording applications, from recording vocals to instruments. I recommend the Audio-Technica AT2020, an all-around studio microphone listed at $99. However, for $149 you can get the Audio-Technica AT2035 microphone bundled with a mic stand, an XLR cable to connect it to the audio interface, a pop-filter to reduce plosives when recording vocals, and a shock-mount to reduce vibration. Now that’s what I call a deal!
4. Monitors
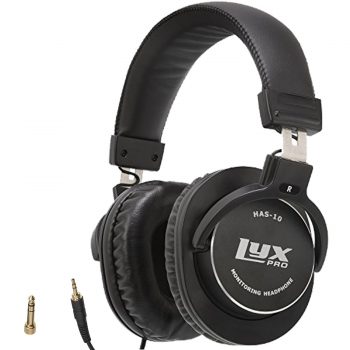 Once you’ve recorded your music, you need to be able to hear what you played. Headphones are a good place to start. In order to hear accurately what the microphone is picking up, you need a decent pair of headphones that has a flat frequency response; in other words, they don’t color the sound by enhancing some frequencies.
The Lyxpro HAS-10 headphones would do the job fine. These are closed back studio headphones, with a pretty flat frequency response, and only cost around $40.
These four key components are the most essential aspects of a recording studio. These selections will allow you a good start towards a professional sound for just about $250. This basic and affordable setup is exactly what you really need to free and focus on your artistic creativity. Have fun making music!


